EZGO Golf Cart Troubleshooting
Nov 15th 2016

Your EZGO golf cart is probably a more integral part of your life than you realize. If you live in a residential neighborhood or gated community, chances are that you use your golf cart for a wide variety of purposes beyond simply golfing―to take a trip to the nearby grocery store, to drive a mile or two to the country club or tennis courts down the road, to act as a makeshift hunting vehicle during hunting season, or even to fetch your mail in rainy or snowy weather.
Consequently, you definitely want your golf cart to stay in top condition at all times, no matter the time of year―rain, snow, or shine.
Two Primary Reasons for Doing Preventative Maintenance
It is imperative that you have a basic knowledge of how to diagnose and potentially even fix problems with your EZGO golf cart. Taking the time to troubleshoot your golf cart, then, is simply one of the most important things you can do to keep maintenance costs low.
The EZGO manual says that, “First, a battery that performs poorly and is outside of the manufacturer’s specification should be identified in order to replace it under the terms of the manufacturer’s warranty.” This means that every manufacturer retains its own unique requirements, specs, and timelines. The less you procrastinate on troubleshooting your golf cart, the easier it will be to get faulty items repaired or replaced.
In addition, the manual states, “The second reason is to determine why a particular vehicle does not perform adequately.” While this reads as entirely obvious at first glance, here’s the kicker: When troubleshooting for problems that you are aware of, you may stumble across deeper, more serious problems that you aren’t aware of . . . and that you may not have picked up on otherwise.
In other words, troubleshooting your EZGO golf cartnot only takes care of the problems you see, but also the problems that you don’t.
Things to Keep in Mind Before Troubleshooting
Before you begin troubleshooting your EZGO golf cart, there are a few things you need to do and remember before you begin. Some issues that you may initially perceive as indicative of a problem with your cart may actually be fairly normal, while still other problems are so simple to fix that they are barely problems at all! Here are just a few of them:
●EZGO golf cart batteries aren’t perfect right away.
Your golf cart’s battery needs to mature completely before it can operate at its maximum levels. This can take as many as 100 full charge cycles, so be patient if the brand new golf cart you just purchased isn’t quite living up to its battery expectations.

●Sticky accelerators are perfectly normal and can be fixed easily.
If you are having issues with the smoothness of your foot pedal, it may simply be due to the air quality of your surroundings and should eventually fix itself. If your golf cart is a few months or years old, the stickiness may be due to constant pressure. This is also normal and shouldn’t interfere with your regular driving. However, if you hear a clicking sound, it may be a sign that you need to get it professionally examined.
●Keep your cart stable.

Firstly, make sure that your cart is resting on flat ground or an otherwise level surface. It’ll be too difficult to properly look at the cart if it is leaning one way or another. You should also make sure to raise the drive tires off the ground.The next step is to make sure that all your switches are in order. Flip the Tow / Run switch into “Run” when troubleshooting battery problems, or on “Tow” if you are taking a look at other issues, such as with the speed controller. Make sure that your key switch is turned ON; next, place the Forward / Reverse selector on FORWARD and place the pedal switch so that it is fully accelerating.
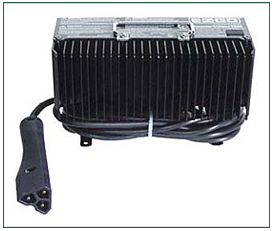
●Make sure your charging wall socket isn’t faulty.
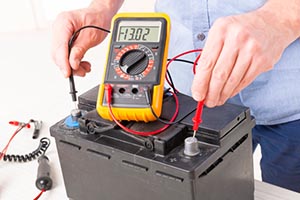
Sometimes there’s nothing wrong with your golf cart at all―the problem is with the charge that it is receiving. Take your voltmeter and test out the socket that you use to charge your cart battery.If you use a separate battery charger, then test that out with your voltmeter.
If you are not receiving a voltage reading, then your wall socket or charger
has gone bad. You can try resetting the circuit breaker or replacing the socket
or charger entirely.
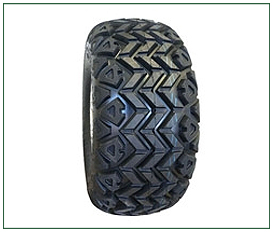
●Keep your tire pressure stable.
Maintaining your golf cart’s tire pressure is key to successful cart maintenance and troubleshooting. The standard recommended pressure of an EZGO cart’s tires ranges from 18 to 22 PSI.
Be sure to inspect your tires regularly, too, and replace them as necessary.
If your cart is driving slower than usual or making strange noises “down
there,” it could very well just be a sign of low tire pressure. Check the
pressure regularly to make sure you don’t just need a good old-fashioned tire
pump!
Troubleshooting
Not all golf cart problems look the same or even require the same levels of
expertise to diagnose and fix. Here are a few of the best tips.
● Troubleshooting your battery:
○Use a hydrometer to troubleshoot
battery problems.Utilizing a hydrometer
is one of the most efficient and inexpensive ways to diagnose basic battery
performance issues with your golf cart.
Hydrometers measure the specific gravity of your battery’s electrolytes. The
lower the SG, the lower the charge on your battery; the higher the SG, the
higher the charge. Having a hydrometer on hand is an easy way to determine
whether or not it is time to replace your battery.
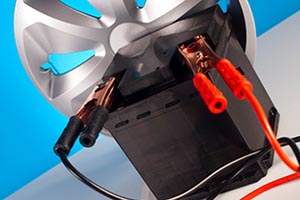
○Check to see if your battery connection hasn’t come loose.A loose battery connection―or even a battery running on lower power―can affect your driving torque or force. If a battery connection has indeed come loose, all it takes is an easy tightening to solve the issue.
If you find that the cart does not move with as much force as usual when you drive―but the battery connection is fine―then it may simply be on its last dregs―in which case, it is time to get a new one. This latter problem is more often found in older EZGO golf carts than in newer ones.
● Troubleshooting your motor.
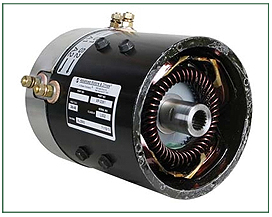
If you suspect that your cart’s electric motor is faulty, you should expose it and inspect it. The motor is contained inside a panel toward the back of the cart. This panel door is generally secured with several screws . Carefully remove them with a screwdriver. Then reset your cart’s motor; most golf cart electric motors contain a special button designed to reset the motor by behaving like a tiny circuit breaker.
You will usually find this button―you can’t miss it; it’s red!―in the same area where various wires enter the motor unit. The red button should be protruding out, completely visible; push it in firmly.
Now test out your cart! Turn it on and slowly press down on the accelerator. If the golf cart begins to move, you’ve fixed it! If nothing happens, and you hear no noise from the motor, then it is most likely finished with its run and should be replaced by a professional.
● Troubleshooting the cart’s solenoid.
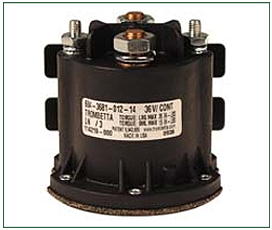
Sometimes it is the solenoid in your golf cart’s battery that is causing problems. Solenoids are a little tricky to navigate, so here’s a breakdown of the different parts of the solenoid, as well as how to test them.
The average solenoid has four distinct posts, which are also referred to as terminals. There will typically be two smaller terminals and two bigger ones. The battery applies its voltage to the smaller terminals in order to rev up the solenoid. The two bigger terminals are then connected together.
Occasionally, these larger terminals become dysfunctional and may need to be replaced. Here is how to determine whether or not your solenoid is faulty:
oPurchase a multi meter or a voltmeter, and keep a ½ inch wrench handy. Your voltmeter should be set to measure voltage in ohms.
oTo test out the solenoid, you should first disconnect all cables running to and from the two big terminals. Make sure to keep them separate so you don’t mix them up later; wrap their ends with masking tape and be sure to keep the ends completely separate from one another.
oMake sure all switches are in the correct position. The cart should be on neutral.
oPut the positive probe directly on the two large terminals, which should be on the part of the solenoid that is nearest to the battery. If the solenoid is fine, the voltage reading should come up as equal to the voltage of your battery. If it is not equal, then the solenoid has a wiring problem.
oYou should also put the positive probe on the opposite post of the solenoid and read the voltage there. The voltage should have three or more volts below the battery’s own reading. If not, then you should get the resistor replaced as soon as possible. If the voltage reading is equal to or greater than the battery voltage, the solenoid is your problem.
●Troubleshooting the speed controller.
The EZGO golf cart retains two different types of speed controllers: the Drive Control System (generally found on older models prior to 1994) and the Precision Drive System (PDS). If your golf cart is unable to drive at a consistent speed when you hold down the accelerator or is driving in a jerky manner, you will need to take a look at the speed controller.
○Put the maintenance switch on “Tow-maintenance. Both the old and new models of the EZGO golf cart should retain a maintenance switch . This is one case in which you will need to keep your Tow / Run switch on “Tow.” You want to make sure that the cart will not move inadvertently while you’re examining it.
○Reconnect the cables on the battery. You should next remove the black cable― also referred to as the negative cable―from the battery before you open up the speed controller’s lid. Once you have securely lifted the cover, you should then reconnect the black negative cable to the battery.
○Check the wires and inspect the voltage. The next step is to closely take a look at every wire running through the system in order to make sure that they are all properly attached and connected to the correct places.
Inspect each wire to ensure that there is no rust or corrosion beginning to appear on them; no frayed ends or breaks beginning to show; and no other types of interference messing with the correct setup of the wires. Measure your battery’s voltage by taking the negative and positive probes and connecting them to your cart’s battery. Make a note of the reading for later use.
○Test the cart’s solenoid. Refer to the above guide on how to test your golf cart’s solenoid.
○Inspect the output of power from the speed controller. You should connect the positive probe to the controller’s B+ terminal, as well as the negative probe to the M terminal. Apply pressure to the cart’s accelerator in order to see if the reading changes from zero to the battery’s complete voltage.
However, if you see that the motor isn’t properly turning, the cart’s problem may lie within the motor itself or even the directional switch. If you get no voltage reading at all, then your speed controller is unfortunately a goner―and it is time to get it replaced by a professional.
Final Thoughts
Your golf cart is one of the most versatile vehicles out there. Most owners utilize them for a wide variety of purposes.
Therefore, it is very important to keep your golf cart in great shape at all times, and learning how to troubleshoot can mean the difference between diagnosing and quickly fixing problems, or having your cart break down.
Now that you know how to properly troubleshoot your cart, you are in control of its fate! With a few simple tools and a working knowledge of how to read them, you are well on your way to keeping your EZGO golf cart in perfect condition all the time.