The Definitive Guide for Reading Golf Greens Like a Pro
May 12th 2017

The old golf adage “drive for show, putt for dough”—meaning golf tournaments are won with good putting—may be controversial, but few would disagree that a powerful stroke is critical for low scores. As such, it’s in your best interest to spend much of your practice time reading greens and working on putting mechanics.
Golf would be a dull game if the putting surfaces were totally flat; instead, they are undulating patches of different size, slope, and types of grass. The art of reading a putt is one of the great skills that is learned through experience and one that can be improved with practice.
Of course, reading a green and recognizing the proper path to the hole is only a part of the equation. To follow the selected line, you must align the putter face and return it squarely to the ball, controlling the initial direction of the putt. Once you have that, you can then work on your ability to control the pace—a vital component of every putt.

Type of Grass on Golf Greens
Modern-day golf courses offer golfers a variety of layouts and designs and, therefore, different challenges. Not only are courses built on different terrains, but they are built with several different types of grass. The golfer must be aware of the grass species used on the green and consider it when reading putts.

The following are the species of grass and their characteristics:
Bent grass is very durable and has a shallow and thick root system which allows it to grow consistently and withstand heavy traffic, making it an excellent choice for public golf courses that see many players. The texture of the leaves is very fine and without grain. It grows well in warm climates.
Bermuda grass grows in clumps and has a strong root system. The grass can be cut short to make the best greens and fairways and is often used to make up the rough of the golf course. Bermuda grass grows well in warm weather, is tolerant of heat and high humidity, and is better at withstanding damage caused by golfers’ divots.
Perennial ryegrass grows well in regions of cooler weather. Like Bermuda grass, it grows in clumps. To achieve a tight and hole-free cover, perennial ryegrass needs to be planted heavily.
Zoysia grows well in mild climates has deep roots, grows in clumps, and has fine blades. The grass grows slowly, compared to other species, but creates a thick mat-like cover. It requires minimum maintenance, is pest resistant, and needs very little fertilizer.

How the Type of Grass Affects Putting
Two features of a green surface—grain and break—impact the direction and the speed of the golf ball. Most grasses tend to grow horizontal to the surface, which produces grain. The grain or direction in which the grass grows depends on the direction in which the prevailing winds blow, the direction of the setting sun, and water drainage on the golf course.
Bent grass grows straight up and can be cut low to produce almost no grain. Bermuda grass grows horizontal to the surface and, therefore, can create moderate to high resistance. Bent grass greens are fast, while Bermuda grass greens are relatively slow even when the grass has been cut low.

The Practice Green
Before you start your round of golf, you need to consider the overall break and grain of the course. The break is the amount a putt moves from right to left or left to right on a green. The grass grain refers to a direction that the grass grows, and this can influence the ball’s break.


Reading the Break of a Golf Course
The overall course slope, geographical characteristics such as water and mountains, and the type and grain of the grass will influence the break.
The Natural Slope of the Terrain
If there are mountains nearby, the natural slope on every green will be “away” from the mountain. If there is water nearby, lake, or ocean, the natural slope will be “toward” the water. For a relatively flat course, ask the pro or course superintendent about the area’s lowest point and natural course break.
Once you know the lowest point, you can evaluate each green in detail. On older golf courses, many of the greens were built with a slope from back to front for best drainage. Modern courses have greens with more undulations than ever and are surrounded by bunkers. They are designed so water runs past a bunker and not into it. Take that into account when you line up a putt.
Reading a Golf Course’s Grain
Down-grain putts (in the same direction the grass is growing) go faster than putts into the grain. The grain of a putting green, of course, influences your putt’s aim point.
There are several methods to determine the direction of the grain:
●The shade of the grass will indicate grain. The lighter sheen of turf means the grass leaf blades are lying away from you or with the grain. Conversely, the darker sheen occurs when leaf blades are lying toward you.
●The condition of the grass around the cup can indicate in which direction the grain is lying. Typically, the side of the cup where the grass is ragged will indicate the side of the cup toward which the grain is growing. On the opposite edge of the cup, the grass should be smooth. This is the side from which the grain is growing.
●The grass on the fringe is also a good indicator. It is longer, making it easier to see the direction it is growing.
Watch the Pros and Practice
The world’s best putters do not just have effective and consistent mechanics but are, undoubtedly, the world’s best green readers. This doesn’t come about by accident. Jordon Spieth, one of the finest putters in golf, spends at least half of his practice time dedicated to the art of reading a green , to place the ball precisely on line, and the control of pace. When he arrives at the golf course for a tournament, he practices putting even before hitting irons or his driver, then returns to the practice green for more putting just before teeing off.

Club golfers can learn by watching the pros, and there are no physical limits to improvement . Study the way a good player stalks a putt, gathering all relevant information so he or she can visualize the line to the hole. Typically, a player will start directly behind the ball, stepping five or six paces back, and get down as low as possible (not necessarily as low as Camilo Villegas) to visualize the path to the hole.
First, ask yourself if it is straight and, if not, what do you think is the maximum amount of break? Identify a line halfway between a straight putt and one taking the maximum break. Use that as your starting point.
Next, turn your attention to the alignment of the green between the ball and the hole. Walk to the low side of the putt and crouch down halfway along the line, so your position creates an equilateral triangle, the ball and the hole being the other two points. Visualize the line you initially identified as it runs on the green.
You also need to determine the profile of a putt—whether the ball will go uphill or downhill. Obviously, on undulating greens, the putt may do both. A useful technique is to evaluate the putt as two parts; the first part of the ball’s path is the straight line it initially starts on, directly to the aim point of the putt. The second, and slower, part is where gravity and the break of the putt combine to swing the ball toward the hole.

Focus on the Details
Make sure you also take a good look at the final two or three feet of a breaking putt from above the line, to identify the angle at which the ball will enter the cup.
When looking at the putt profile from the low side, ask yourself if the putt is slower or faster than a totally flat putt. It’s easy to be deceived looking directly down a line or from above the ball as you stand over it at the set-up.
The Elements
The elements play a part in all this, too. If there is wind, how strong is it and what direction is it blowing? If it is blowing directly with the slope, and in the direction you see the ball breaking, a strong wind could add as much as 25% to the break. A three-inch break becomes four inches. The wind effect is more severe on faster and firmer greens, especially those that are exposed. If the wind direction is against the line of a putt or holding the ball up the slope, the effect is minimal.
Putt Speed Close to the Hole
When the top pros go through their routine , you will often see them walk right up to the hole and take a good look around it. Standing near the hole they can get a clear picture of the way the ball will react as it slows and also identify the angle at which the hole is cut. Just as important, the pros want to evaluate the speed of the putt up to about three feet beyond the cup. If there is a significant slope past the hole, there is a risk of the ball running away and leaving a tough return. In this situation, the smart play would be to err on the gentle side, dropping the ball in the front of the cup. If the green runs uphill beyond the hole, the putt can be much more aggressive.

For the last few feet of a breaking putt, visualize the path of the putt if the ball were to run a couple of feet past the hole. Trace the origin of that line back to establish precisely where the ball needs to be as it rolls toward the hole. Try to identify the exact part of the hole you visualize the ball entering as it approaches the cup. For example, if the putt is breaking from left to right, disregard the right half of the cup. Focus only on the left half.
An alternative technique would be to imagine where the ball would finish if it were to run right over the middle of the hole at the perfect pace and finish about two feet beyond the cup. Once you have this image fixed in your mind, rewind the line back to identify precisely where the ball needs to be moving as it approaches the cup, the final three feet of its journey to the hole. When you have found your aim point, you only need to align the putter face squarely to the ball on that line and then hit the stroke that produces the desired pace.
For a double-breaker putt, pay much more attention to the second part of the putt, as it slows down. Pace becomes the critical element of the “read” in this case. If you face a 20-foot putt with a break over the first 10 feet, the remainder being flat, you must recognize that rolling the ball at the speed necessary to reach the hole will lessen the effect of that break. So, while the break may read four inches on the initial 10 feet of the putt, and you need to roll the ball with the pace to travel twice that distance, the actual break could be half that amount.
Key Points to Remember for Every Putt
On the practice green, hit putts with the objective of leaving the ball on the high side of the hole and as close to it as possible without dropping. It is an excellent way to train your eyes to see the maximum break.
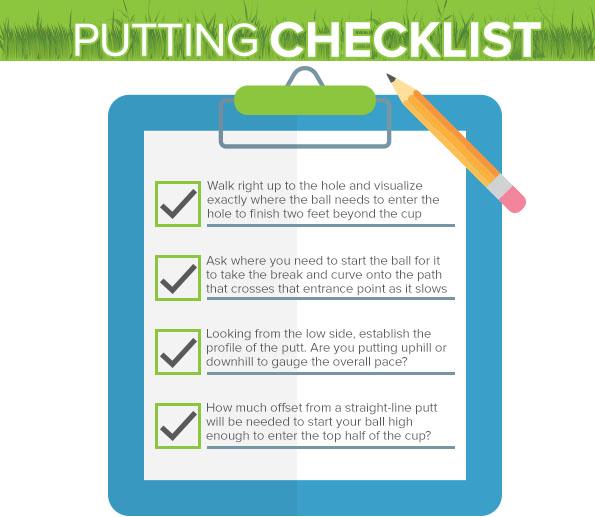
Putting Checklist:
1. Walk right up to the hole and visualize exactly where the ball needs to enter the hole to finish two feet beyond the cup
2. Ask yourself where you need to start the ball for it to take the break and curve onto the path that crosses that entrance point as it slows.
3. Looking from the low side, establish the profile of the putt. Overall, are you putting uphill or downhill to gauge the overall pace?
4. Crouching behind your ball, reconfirm how much offset from a straight-line putt will be needed to start your ball high enough to enter the top half of the cup.
Don’t forget to take into consideration the overall golf course break, the direction of the grass grain, and the characteristics of the type of grass. Just remember, the pace will have four times more influence on the amount of break than the amount of side slope. Therefore, a putt on a small side slope can end up breaking a considerable amount on a very fast, firm surface.